

[Guest post – review by Fatherkao]
I’ve never thought of installing cameras at home. Until I got kids.
Suddenly, I was scrambling around looking for options, exploring the different types of CCTVs, Internet Protocol (IP) cameras and similar options at baby shows and IT shows and trying to memorize all the specifications as if they meant something. Truth be told, all those wonderful specifications of different cameras meant nothing because I did not understand a single thing. Who could tell the difference between a centralized IP and a decentralized IP camera system? Say what? I just needed something simple to set up and something that worked so I could check on my kids often.
In the end, I settled for a video baby monitor which gave me a limited range of a room in their early years. Towards their toddler years, a baby monitor was no longer good enough so a friend lent me his IP camera to try out but the setting up was really frustrating. Not to mention the available support for mobile apps was so limited. It was a total nightmare and I eventually gave up.
I was glad when the folks at D-Link sent us a D-Link DCS-936L HD wi-fi camera to review so I can see how much things have or have not changed since my last contact with an IP camera.
It changed my mind about IP cameras and I can now declare that technology has evolved!
Cameras are now getting better. The DCS-936L HD wi-fi camera has great features which users will appreciate and the best part is its quick and simple set up steps.
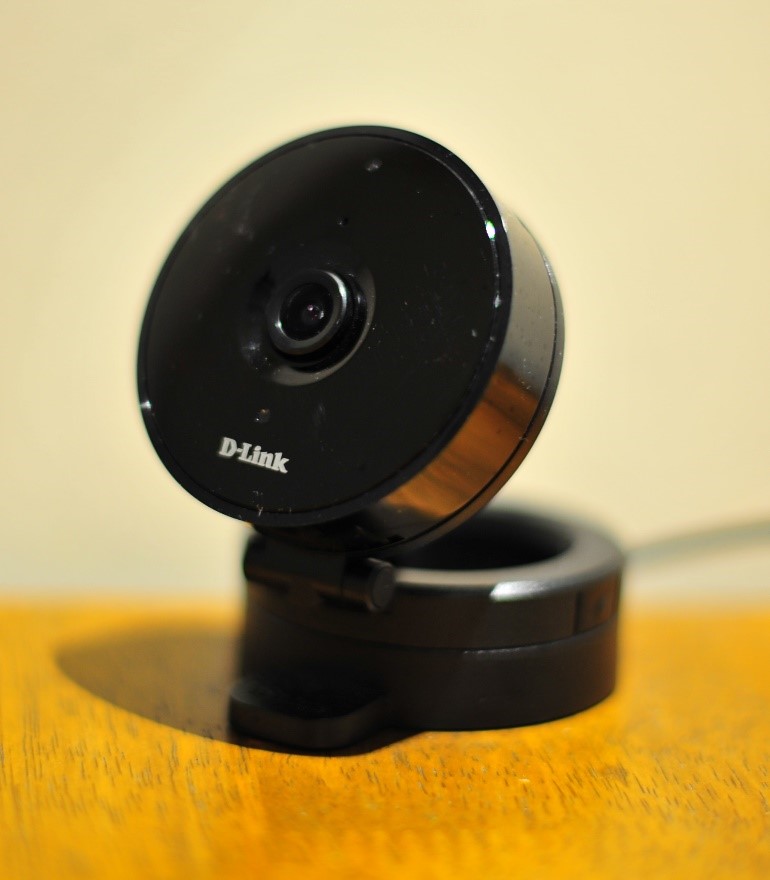
It’s also compact, sleek, extremely unobtrusive (not clunky or ugly) and very easy to position anywhere in the house.
The DSC-936L camera features a wide-angle lens which covers a 120° view angle (no panning required!) and the live 720p (1280 × 720) HD video during the day or night is sharp. The camera can be rotated to suit your preferred viewing angle and the video quality is excellent while the built-in microphone captures audio rather well.
I placed it just beside my fish tank to test out the audio and I could hear the faint burbling sounds of water quite clearly. Combined with the good live video quality, it was like those fish aquarium screensavers we used to have on our desktops! However, I do find the night vision mode overly sensitive on auto mode. You will also need to get used to the clicking sound every time it switches mode.
You can take great stills directly with mydlink phone app and store them on your phone or you can connect the camera to your D-Link network-attached storage (NAS) and store the stills and videos there. For me, I’m using both mydlink phone app and NAS.
There is also a MicroSD slot which can house a 128GB card. This means you can have up to 72 hours of continuous recording and much more based on where the camera is located. The camera features both motion and sound detection so you can always be assured of the responsive recording.
You can also adjust the sensitivity level for both motion and sound detection when the camera is set up.

The sound detection sensitivity level can be adjusted based on real-time information from the camera. This makes it very easy for users to adjust the detection level based on the ambient noise in the placed location.
For more technical specifications, you can refer to them here.
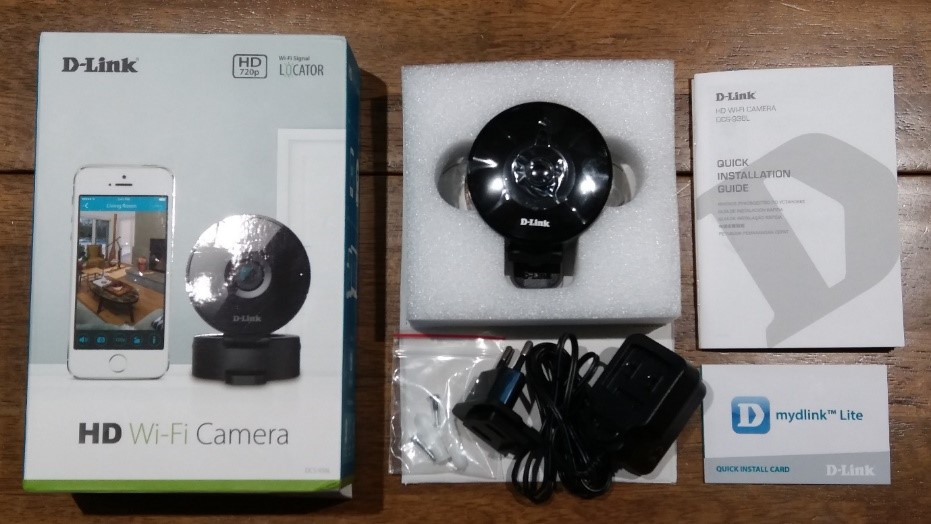
The box set comes with the camera, the power adaptor, 2 mounting screws, a Quick Installation guide and a Quick Install card.
The setting up of the camera caught me completely by surprise. It was so easy that I resisted the greatest impulse to run out and buy some more cameras to outfit my entire house. The Quick Install card is a must as it contains all the important information you will need to set up the camera. You will need to register a mydlink account using the mydlink Lite mobile app or on the mydlink website. Once you have successfully registered an account with mydlink, you can set up the camera with the following steps:
- Select “Remote” and not “Local”.
- Scan the QR code found in the Quick Install card after you click “Add a New Camera”.
- The app will locate the camera and a notification that the camera is connected will show at the bottom of the phone.
- Select the home wi-fi network for the camera to connect to. (I did not use the WPS function on the router as I was not sure what it would do.)
- Key in the camera wi-fi password found in the Quick Install card.
- It will then link the camera to your ‘mydlink’ account.

And it’s done.
Configure the camera to your heart’s content.
Fatherkao’s Verdict:
The D-Link DCS-936L HD wi-fi camera has certainly changed my mind about the ease of setting up an IP camera. The camera is packed with features and style which users would appreciate. And every noob would definitely love the plug and play features; you don’t have to know much technicalities to install one, for sure.
I have found this camera to be very reliable with no disconnectivity or over-heating issues and would definitely trust this little camera to spy on my children.
Disclosure: D-Link sent across this camera for the purpose of the review. All opinions here are our own, and we only share what we think, in utmost honesty!


No Comments